I got to look at the Transfer Relay properly earlier this week, if you are bored by minutia it's probably time to switch over the channel.
'Fraid I just love this sort of investigation and repair, the tinier the better.
Firstly I had to worry about how the wire connections would be made to the tags at the closed end of the casing, sure enough, teasing the main Relay body out of the case tore the wires off the inside of the stubs and at that stage it felt like 'bye bye Relay'.
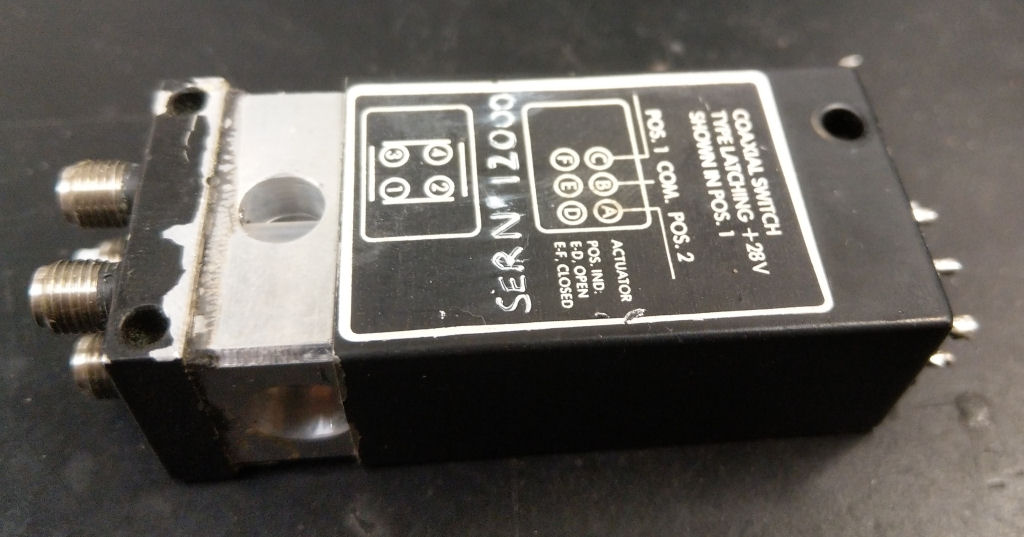
- IMAG0287e.jpg (85.68 KiB) Viewed 4098 times
Once open, I was impressed by the quality of the mechanism although confused by the wiring through two multi contact leaf switches.
It was immediately obvious that there was some light rusting of various metal parts, trying to prod the relay drum between states showed that not only was it sticky in operation but also that two plastic pegs operating the leaf switches were stuck too.
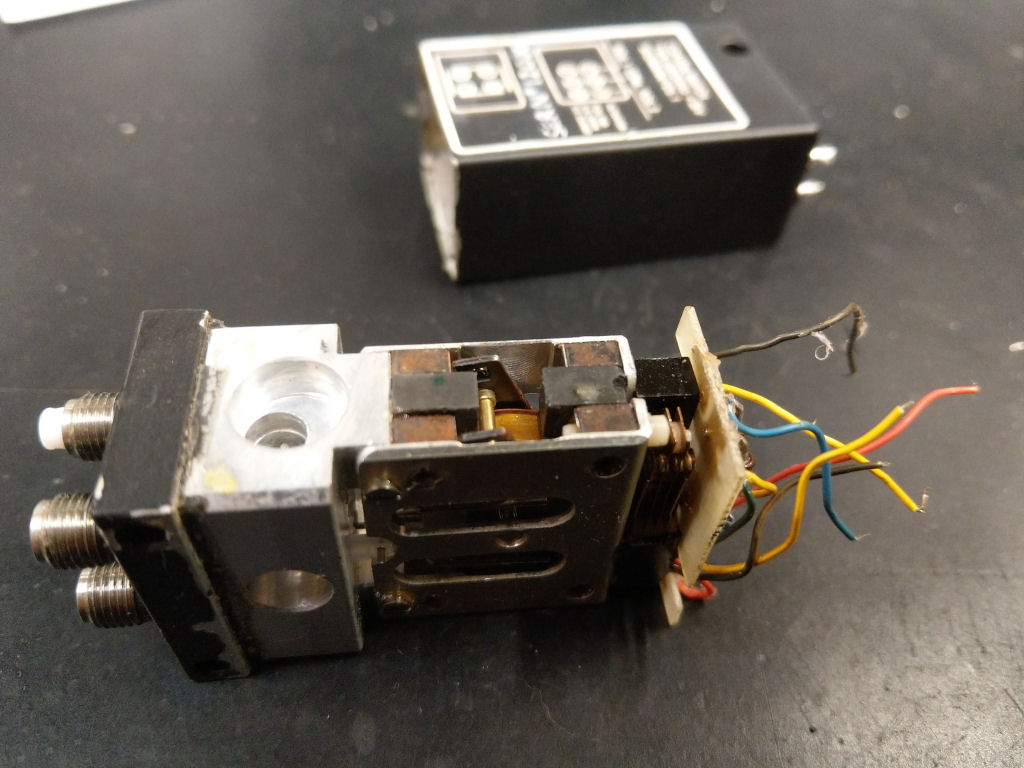
- IMAG0288e.jpg (117.75 KiB) Viewed 4098 times
A good clean up of the drum assy and lubricating the pivot points soon freed up the drum, then the operation was being obstructed by the plastic pegs. One cleaned up in situ but I had to remove the leaf switch for the other in order to remove it completely before it would clean up sufficiently.
Then I had to work out which wires went to where so that I could get them back to the correct tags. This took longer than I thought and had to resort to making a circuit diagram.
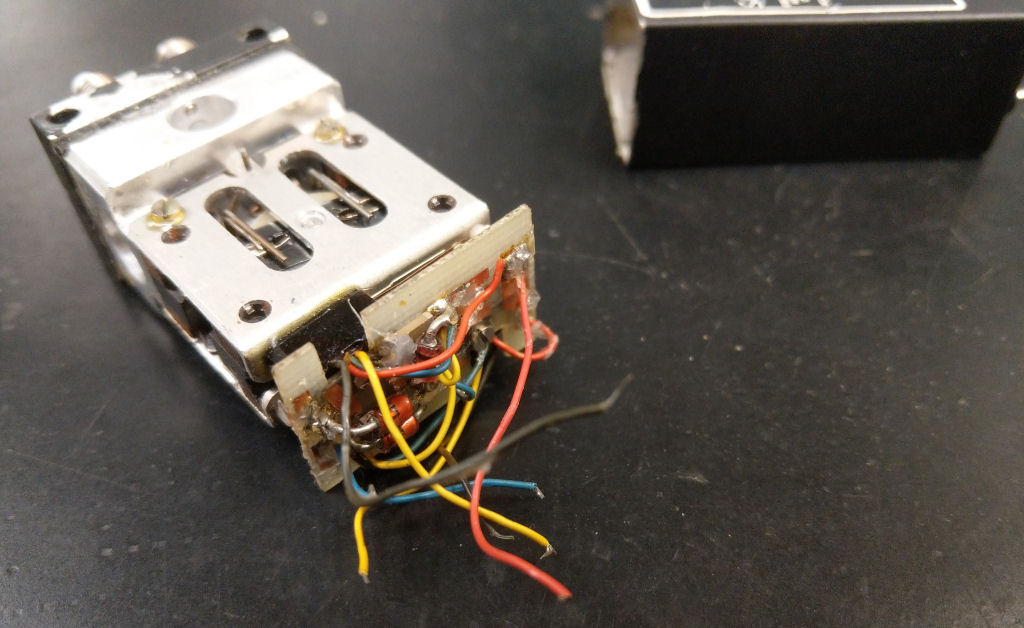
- IMAG0290e.jpg (105.68 KiB) Viewed 4098 times
Finally I had to fathom some method of getting the wires back.. It took a while to come up with a plan... I Cleaned out the small tube stubs on the casing by using a resistor wire with the Soldering Iron then finally added a far greater length of bare wire to extend the torn wires enough (and replaced two completely) to be able to feed them into the stubs by hand, it was then just a matter of pulling the wires through slowly as the relay was eased back into the case.

- IMAG0292e.jpg (72.47 KiB) Viewed 4098 times
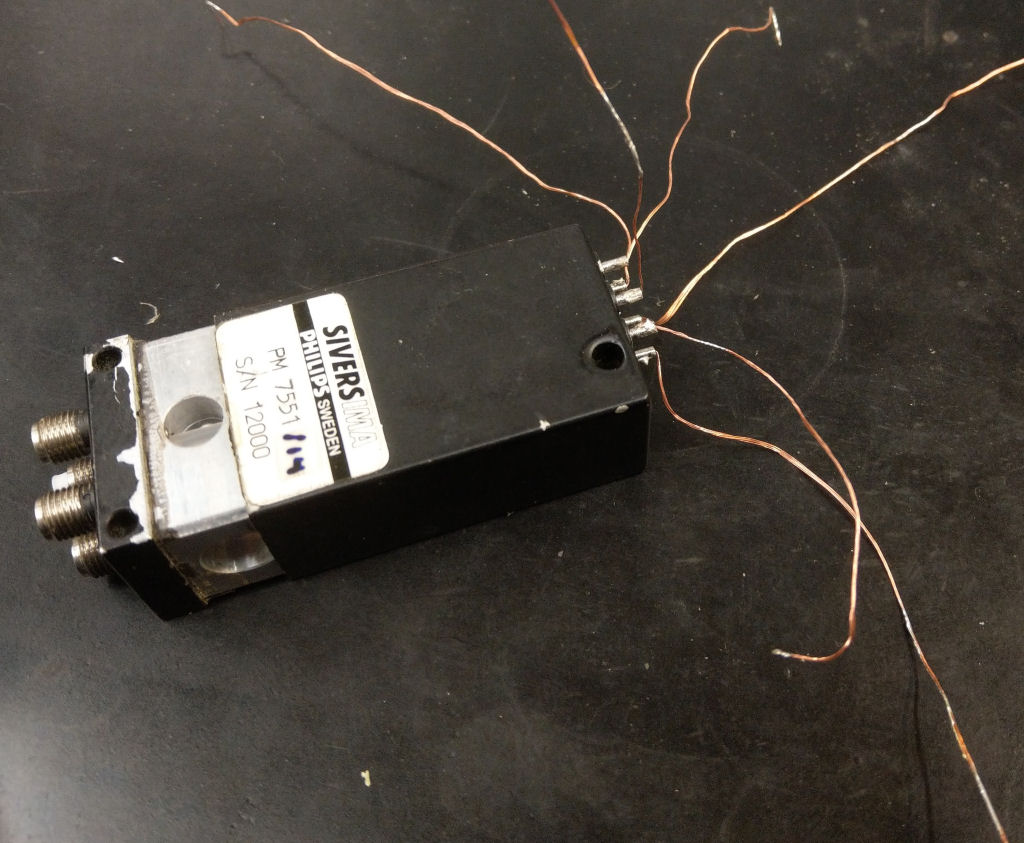
- IMAG0293e.jpg (141.61 KiB) Viewed 4098 times
Then a last check the operation before snipping off the excess wires and finally seating the body back in the case. Job done and now ready to use.
