Using a stock 2-port PLL Octagon and SDR CONsole, I was getting the NB beacon at about 38-40 snr.
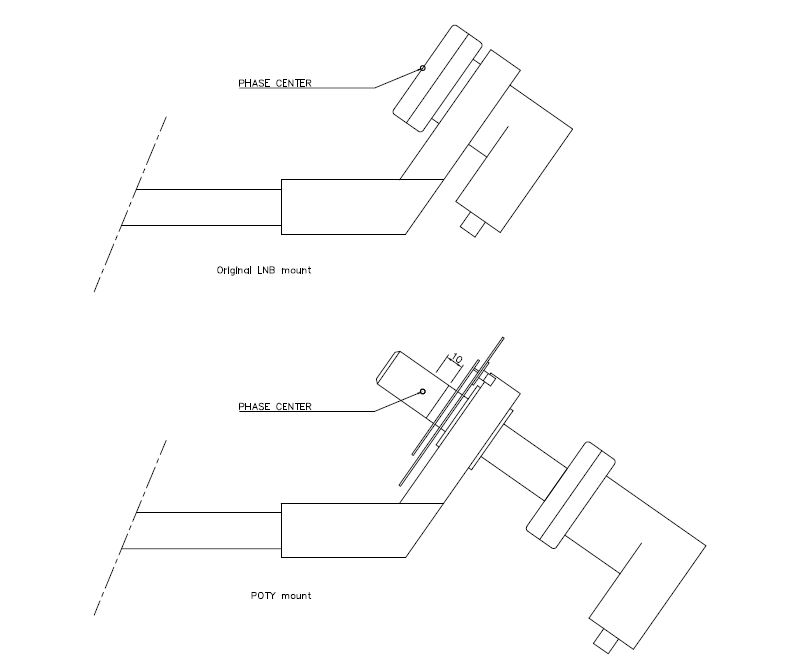
Today I changed to a POTY with rocket lens, but the LNB mounting arm does not let me locate the round reflector where the original LNB lens would have been. The snr is now about 34, but as I can see the noise floor, is it worth pursuing?
If yes, I can either cut away a little of the inside support arm where the POTY disc is touching, or cut a flat on the edge of the POTY. The sellotape is holding in the Rocket LNB lens, which replaced a 3-D printed one (which was -3dB).
Which, if any, should I bother with?
Suggestions welcome.
Gareth G4XAT
- NB_Segment.PNG (86.15 KiB) Viewed 3476 times
- inverted dish.jpg (199.74 KiB) Viewed 3476 times
- POTY_ARM.jpg (248.24 KiB) Viewed 3476 times